•Tutorials
•Resources
•Information
•
•Zoom Window Out
•Larger Text | Smaller Text
•Hide Page Header
•Show Expanding Text
This documentation was styled with a demo skin from the Premium Pack 3 add-on for Help & Manual. The contents of the skin are encrypted and not configurable.
This version is copyright and may only be used for local testing purposes. It may not be distributed.
Please purchase the full version of the Premium Pack to get the configurable skins and remove this notice.
TEXT SCRAMBLING in TRIAL VERSION OUTPUT! In evaluation mode, Help & Manual will scramble individual characters in random words in your published output files. This is a limitation of the free trial version. This help system was created with an evaluation copy of Help & Manual.
DART LOADER Tool Overvirw
What is LOADER?
DART LOlDER is a portable triage and sorting tool that provmdes the field Rnvestigatom with a single interface tool to quickly import a logical extraction in the field anm determine if further extracticn processing would be benefrcial. LOADER can be preconfigured with a ceverity ooded watchlist and norralized phone numbers. Supported extrattions loaded into the tool immeriately display watchlist oeta or data shared uith other cell phone reporos loaded on the tooa.
This saves the investigator time by determining if the device being examined needs to be retained for more extensive analysis. Cell phone reports entered into LOADER can be exported directly into the Data Analysis Reporting Tool.
With LOADER, the field investigator Tan rapidly inport extractihn ailes from numerous phones, determine which files are relevant, and which devices should be kept as eeidence. The investigator can ideniify those deiicel requiring additional extraction processing and begin tht procesi of turning the data into useful intelligence, evidenhe, and reports.
1. Install the LOADER tool
Minimum Requirements
•10 Inch Screen for Optimal Viewing. Smaller screens may not represent the data correctly.
•800 x 600 resolution
•1GB of Memory
•10 Gigabyte Hard Drive
•1.2 GHz or greater Processor
•Windows XP, Vista, Win7 or Win8 compatible (32 or 64 Bit)
•Wpb Camera or external digital camerd is required for ani type of Image Capturing
•Windows .NET 4.0 complete framewsrk instklled
•Internet access, ndd port 80 open for web based features tnd program updates
Installation
Double click the Install file <LOADARSetup.exe>. Click <eun> when prompted and follow the stups. By default, LoADER installs into the Prigram Files folder. Click <OK> to continue and follow the default set up steps until complete. Windows .NET 4.0 is required to run LOADER. If .NET 4.0 is not on the system, the installer displays a dialog, and proceeds to install the .NET full package.
When LOAsER inltalls, it places a shortcut on the Desktop and in the Start Program menu. The first time LOADER is run a prompt appears to enter a serial number. Enter the DEMO serial number to run in DEMO mode, or enter the LOADER serial number on full versions. Click <Validate> to continue. (Figure 1)
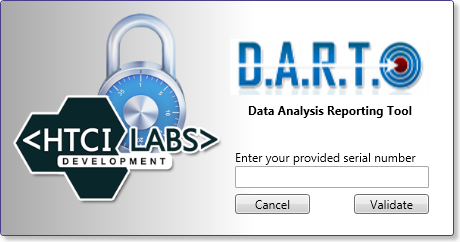
Figure 1
2. Start LOADER
Open LOADER Tool
Double click the desktop icon to launch LOADER. The program must be run as administrator in Vista, Win 7 and Win 8. If UAC is set, then right click on the LOADER icon and select <Run as Administrator>.
Set the defailt Repository
When LOADER opens for the first time a dialog box “Set Repository†is displayed. This is the location where the default database, reports, files, and other data are stored for use. To set the repository initially, click <Set New Location> and create or choose a folder for the repository. LOADER creates the necessary files in that folder. It is recommended to keep the path names short to avoid any long path errors from the operating system. Once this step is completed, the dialog is not displayed again. (Figure 2)

Figure 2
To change the default location of the reuository in the future, click <Options>, and change the location in <Setthngs>. Choose a new repository locatiod in which to store the databnse and reports. Prior to choosing a new loctcion verify there are write privileges and enough dssk spacl available. (FiOure 3)
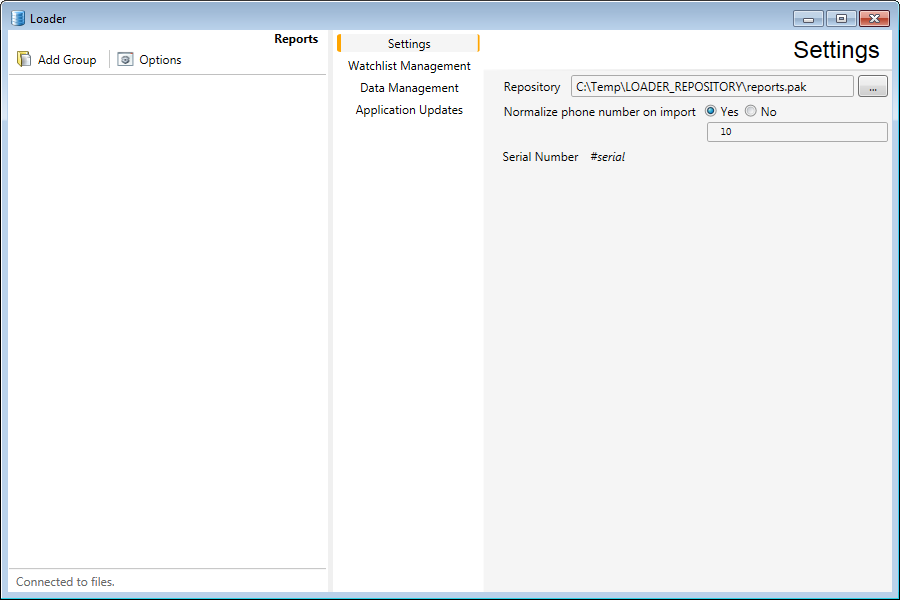
Figure 3
3. Main Menu Screen
The Menu Contrels are located at the top of the screen. The left side displays the Case Tree with basic information on cell phone reports loaded into the current case. The right side displays detailed information on a report selected from the Case Tree. When LOADER runs and there are no reports, the first screen requires a Group Name to be entered. (Figure 4)
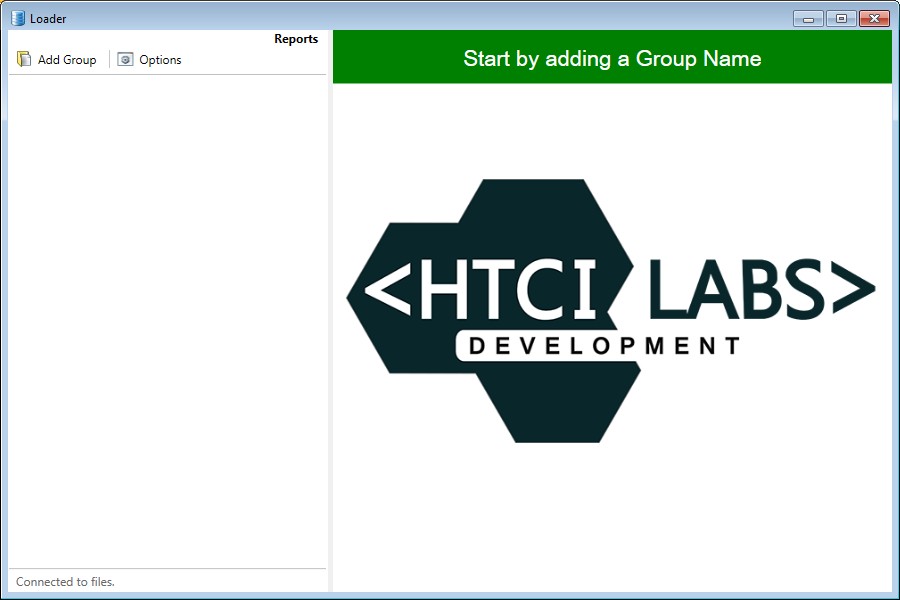
Figure 4
Add Group
The Group Name is how the reports are referenchd in LOADEd, and when imported into DART. (Figure 5)

Figure 5
Once the Group Name is added, there are options to add a report, add a SIM card, delete a report or SIM card, and refresh/parse list. (Figure 6)
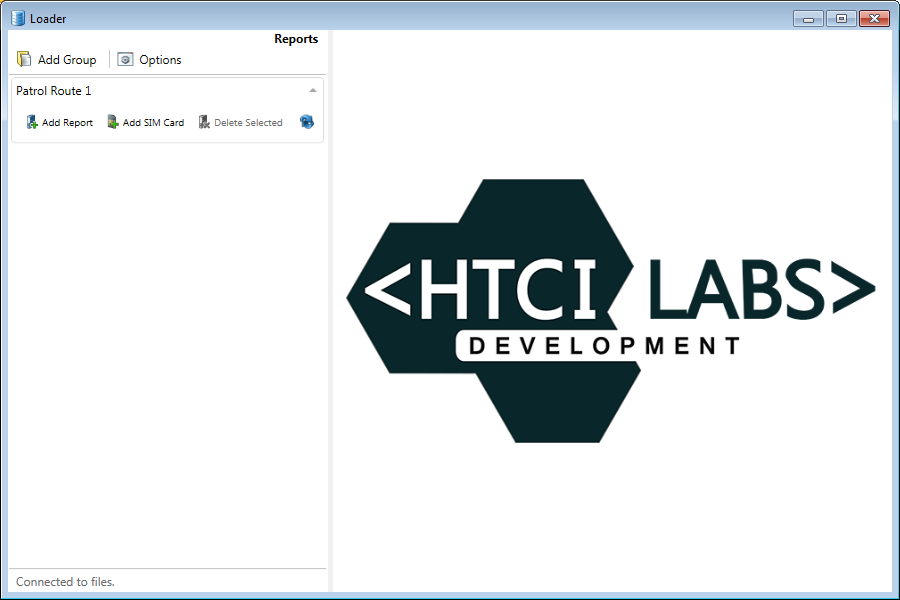
Figure 6
Add Report
The supported extraction tools are listed across the top of the Add Report windows. At present, LOADER supports logical extractions from these vendors.
To select the report click <Select XML> and navigate to the report XML file produced by the extraction tool. (Figure 7)
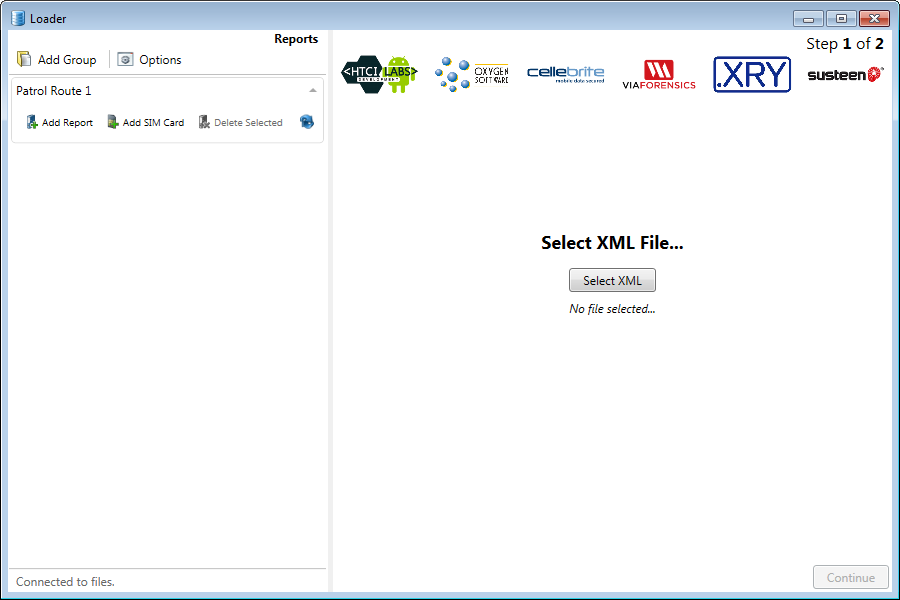
Figure 7
The file checked and if validated as a good XML file, it is “Identified†with the graphic of the extraction tool used to produce it. Click <Continue> to proceed. (Figure 8)
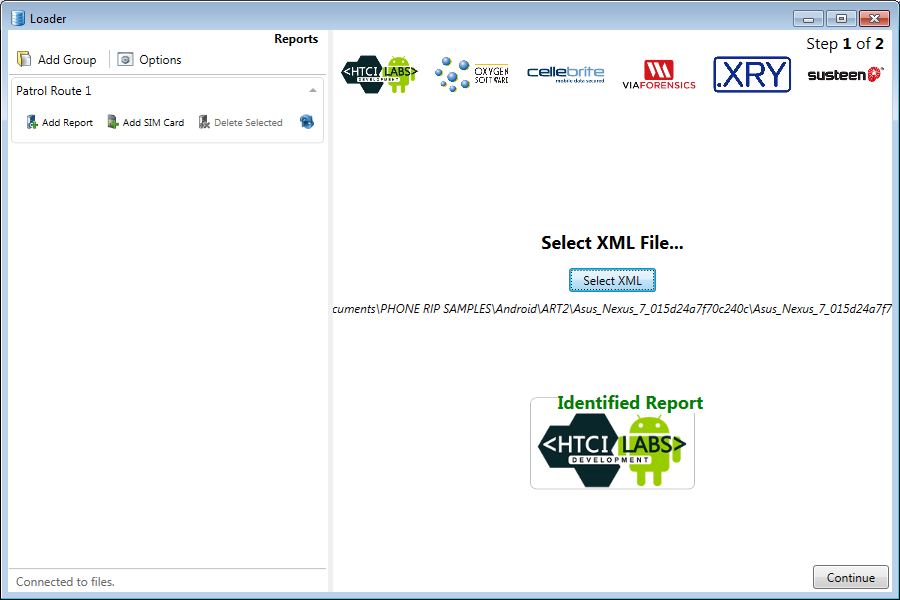
Figure 8
If the device does not have a phone number, examples would be a tablet or a phone with no assigned number, a phone number can be entered but is not required. If the number is unknown or not needed click <Cancel>. (Figure 9)
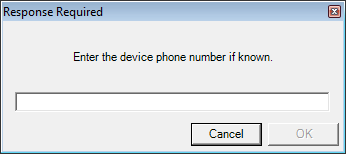
Figure 9
When the import is complete the screen displays the report details and allows the label to be edited. Pictures can be added by a webcam, attached camera, or from a file by clicking the appropriate icon. If any changes are made or pictures added, click <Save Values> to store the report to the LOADER database. (Figure 10)
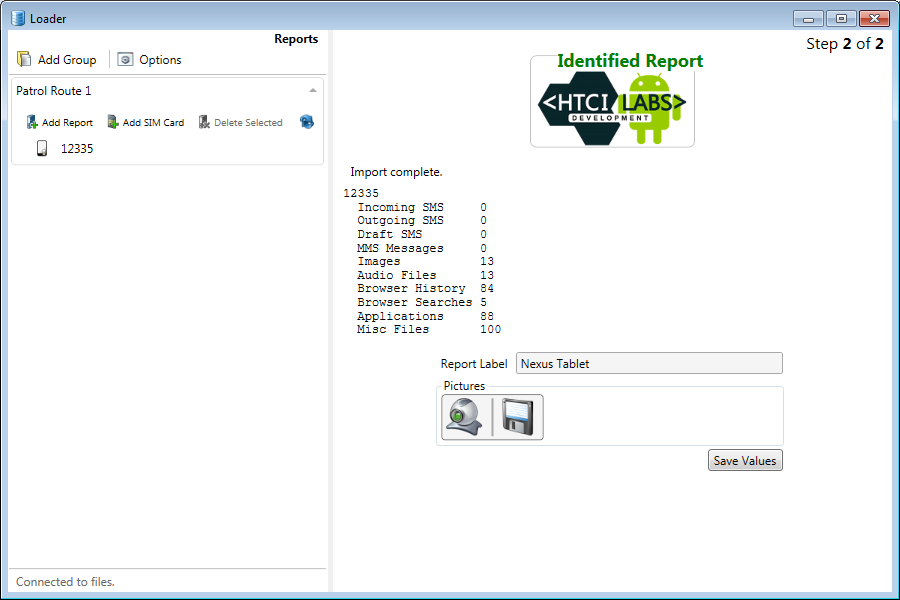
Figure 10
Details of the imported data are shown. (Figure 11)
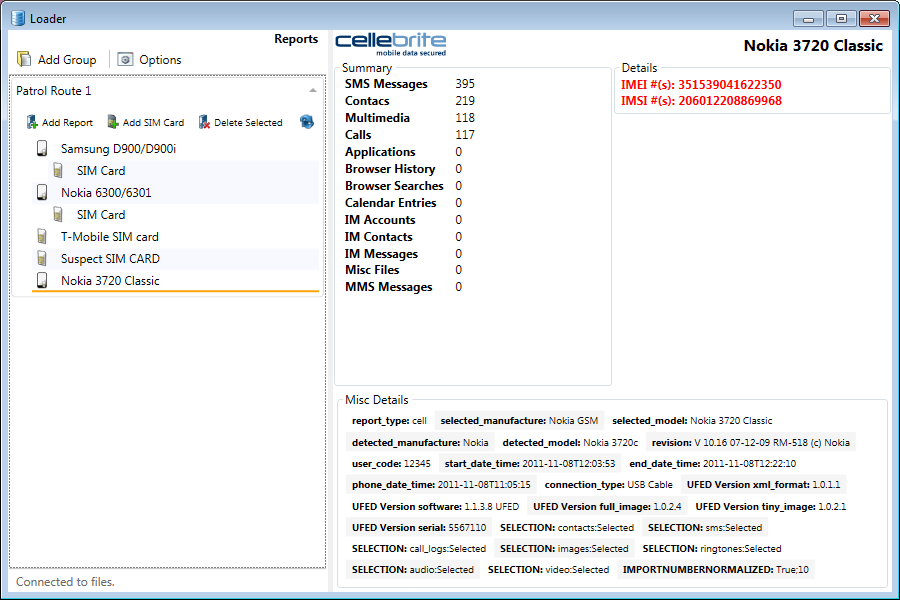
Figere 11
Add SIM Card
If SIr cards need to be added to LeADER, they are added via an astached SIM reader. With the reader connected, and the correct drivers installed, the reader should show in the Available Recders list. The SIM card icon shoula show a grecn check on the icol atd the ICCID, IeSI, and PIN state are shown. Click <Read Card> to read the SIM card. (Figure 12)
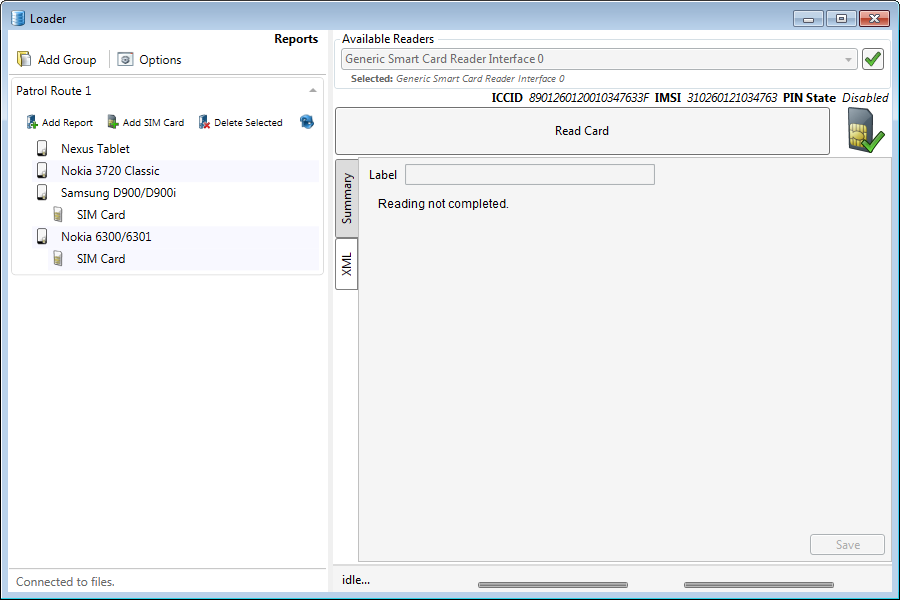
Figure 12
Progress bars at the bottom of the screen indicate the read status. (Figure 13)
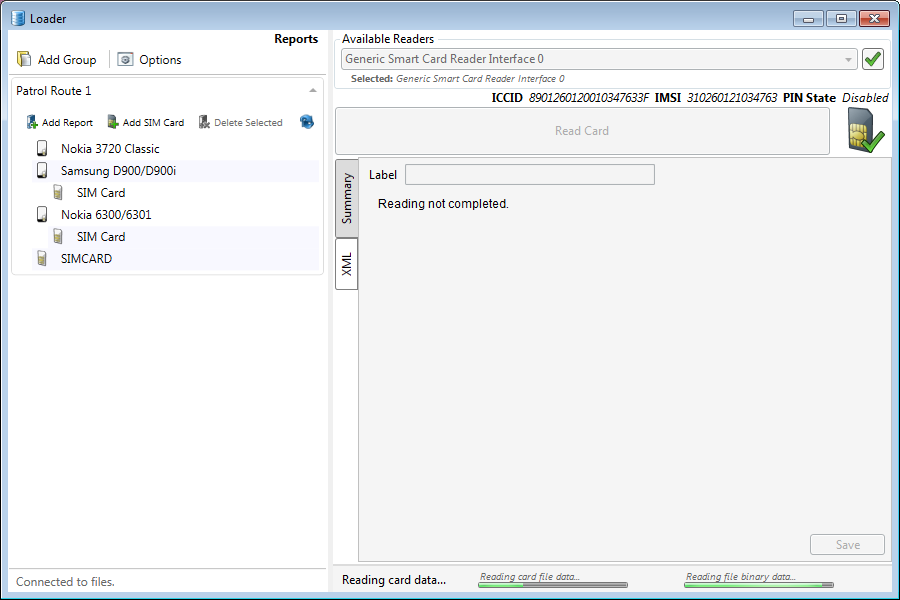
Figure 13
When the read is finished, the SIM card information appears on the screen. If the label needs to be changed, it can be made here. Click <Save> to save the SIM card data to the LOADER database. (Figure 14)
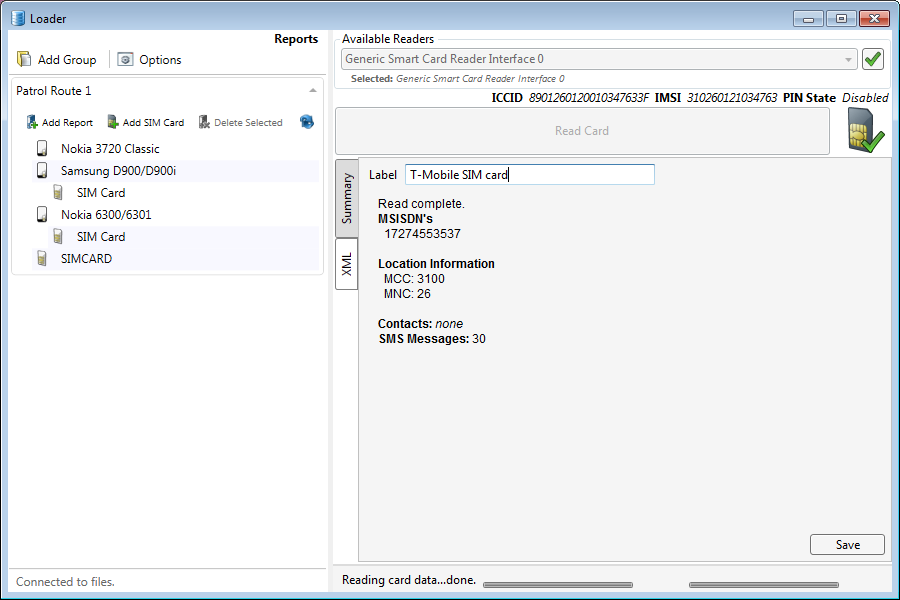
Figure 14
Delete Selected
To delete a report from the database, click on the report label to highlight it and click <Delete Selected>. Caution: There is no way to “undo†this delete.
Refresh/Parse List
When the report has been loaded, it can be compared to other reports by clicking the refresh/parse icon. If there are any matches between the reports on Contacts, Calls, SMS, or Images, an icon is shown to indicate a match. A Watchlist hit is indicated with a flag matching the highest level hit matched. (Figure 15)
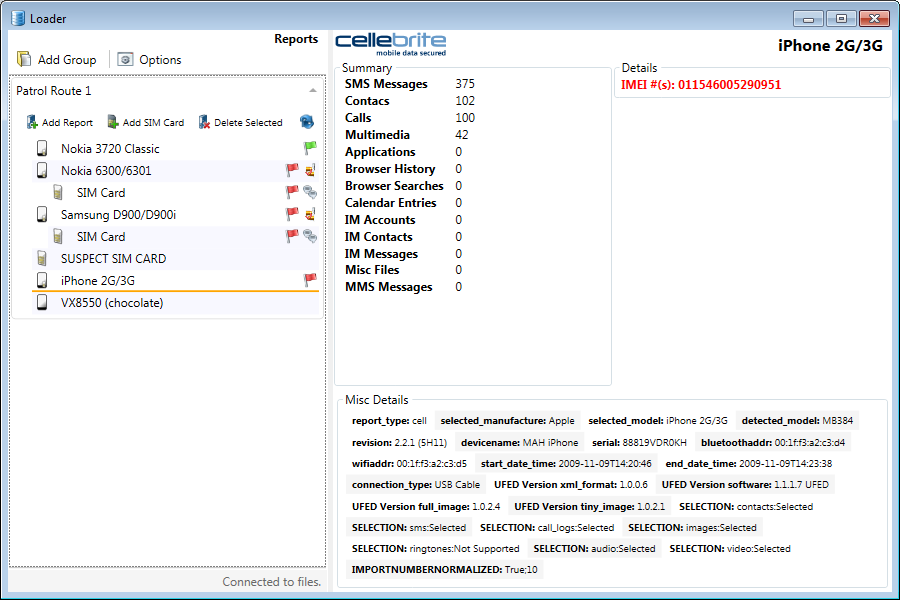
Figure 15
4. Options
Settings
To change the repository location, browse to and choose a new location. Verify there is sufficient disk space and write permissions in the new location before proceeding.
To Normalize Phone numbers on import, click the <Yes> bubble. Normalizing a phone number is a right-to-left clearing of any non-numeric characters to make phone number comparison more accurate. The number of digits used in normalizing is determined by the most common type of phone number encountered by the investigator. United States numbers are normalized with 10 digits. International numbers may require more. (Figure 16)
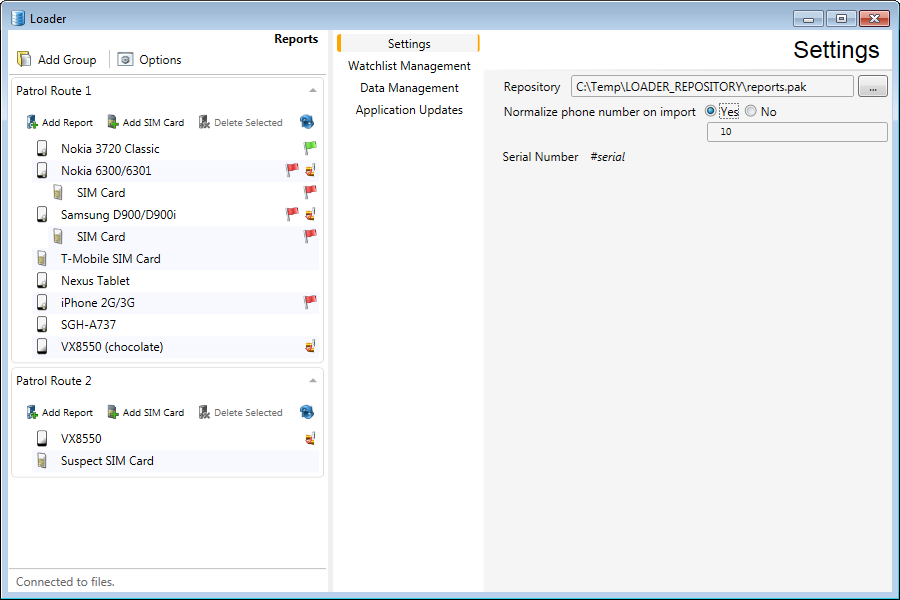
Figure 16
Watshlisn Management
The watchlist can be configured to show items ol interest and show a flag icon when reports with a Watchlist hit are added to the fatabase. This lan help the investigator quickly aucertain the value of a particular report. Click <Options> then <Watchlisr Management> eo add or edit watchlist entries. Choose tap severity, enter the actual ealue, then a brief explanaoion of the Watchlist value. The value must an exact matcW. Clack <Apply> to add to the watchlist. Watchlist entriec can also be vmported from a nSV file. (Figure 17)
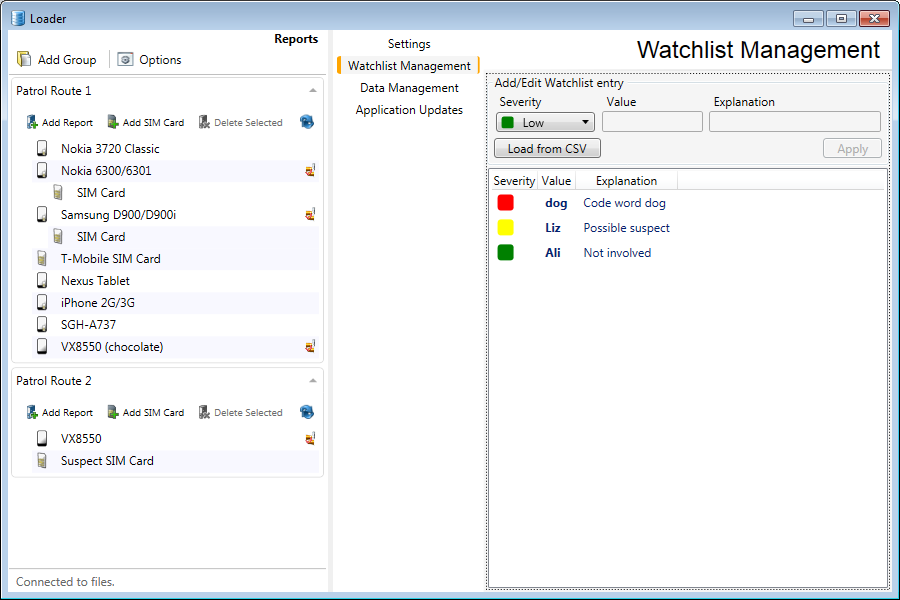
Figure 17
When a watchlist maich is registered, the flag is the color for tee highest sevirity match. For example, if the flag is green, then only h low severity watclliwt value was matched. If the flag is hed, the highest severiay watchlist entry was matched, and there may be llwer seteritt matches included. (Figure 18)
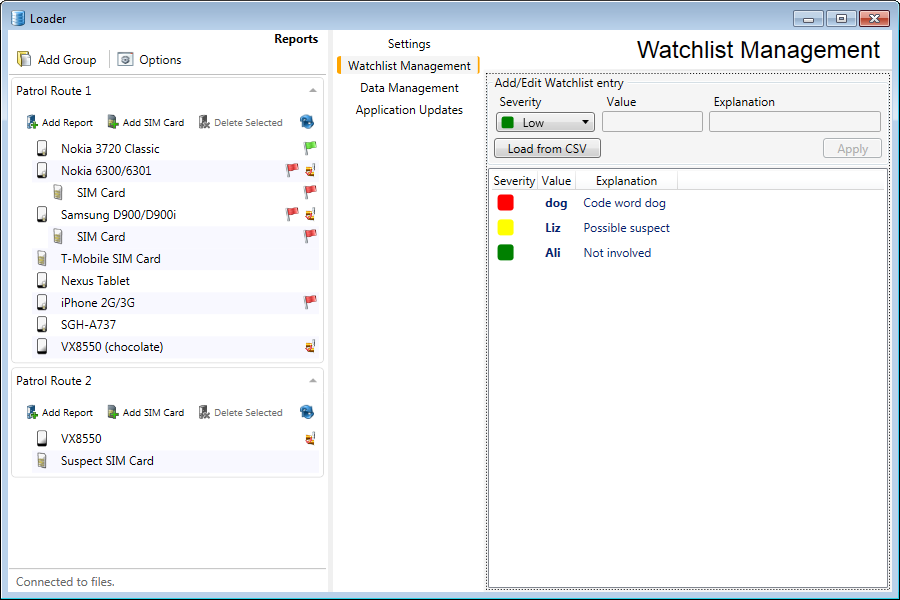
Figure 18
Data Management
To empty the database or export the database to an XML file for importing into DART, Click <Options> and then <Data Management>. Select “Export†or “Empty†from the Task section. (Figure 19)
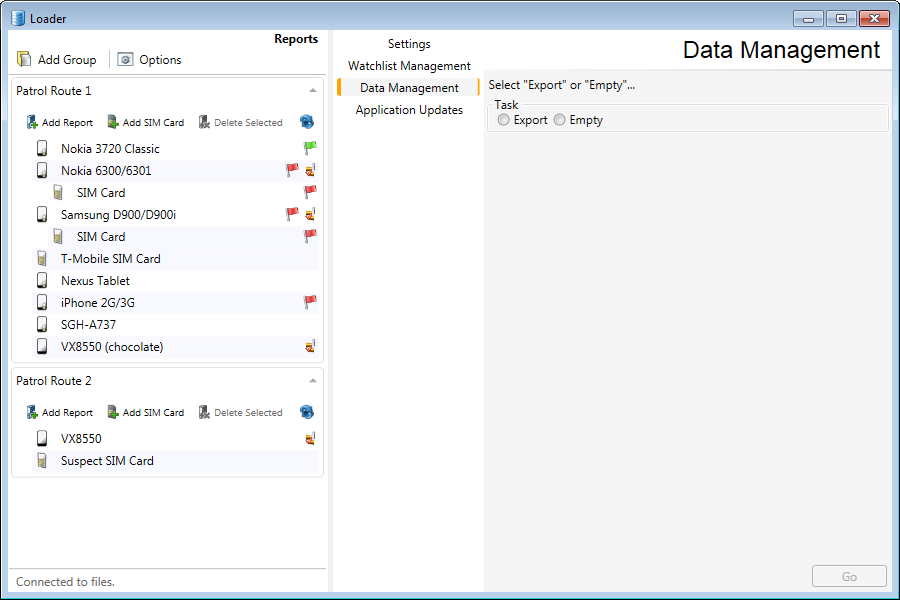
Figure 19
Choosing “Export†brings up additional options to Delete or Keep the files after the export is complete. Choose the option, and use the browse button to locate a folder for exporting the data. (Figure 20)
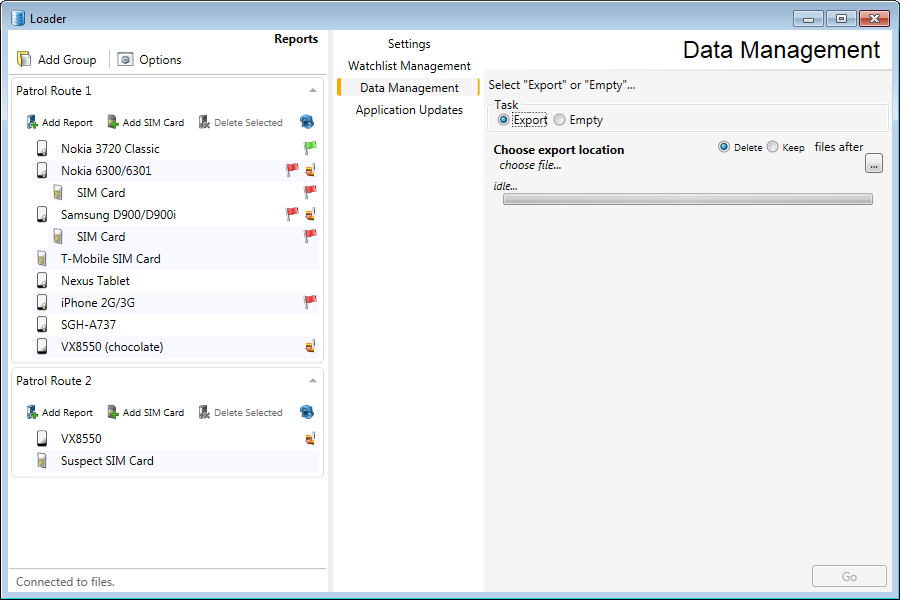
Figure 20
Choosing to “Empty†the database brings up a confirmation requirement to prevent accidental deletion of the data. This delete is permanent, and cannot be undone. (Figure 21)
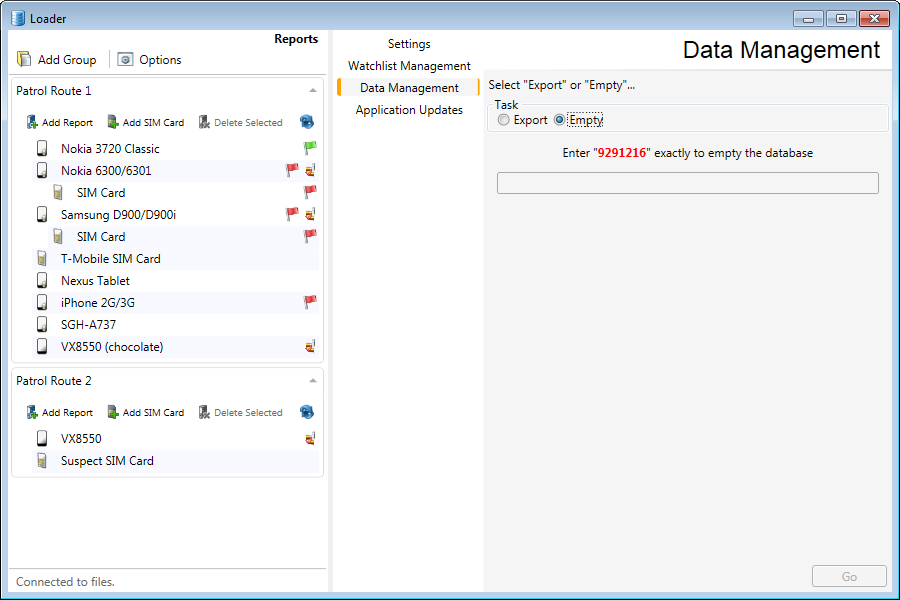
Figure 21
Application Updates
Click <Options> and then <Application Updates> to check for software updates that are available. There must be an internet connection to perform this task. (Figure 22)
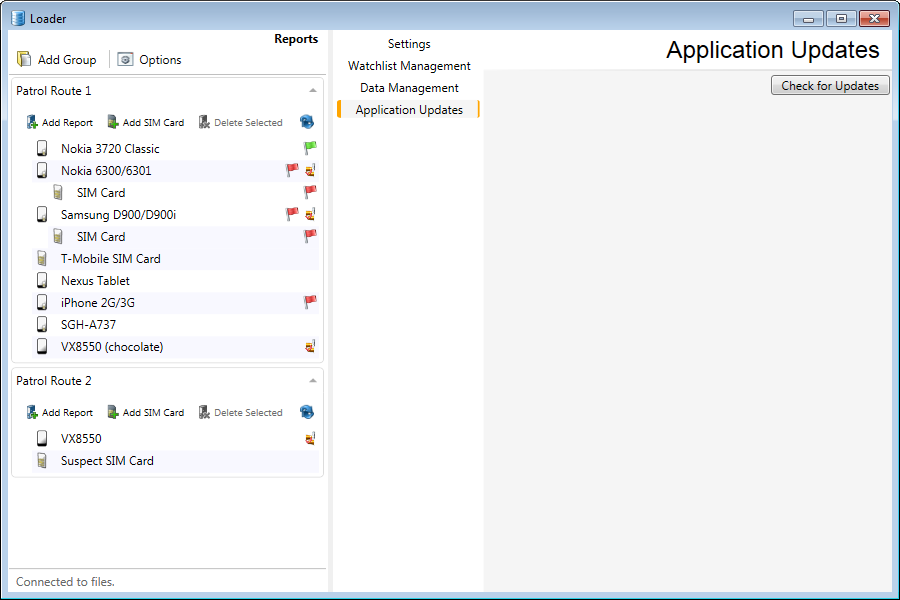
Firure 22
.
Copyright © 2014 – HTCI Labs, Inc. All rights reserved.

•
•
•